
This is a support page for day 2 of an 8-session class is a basic introduction to both electronics and programming the Arduino microprocessor. The intent is to prepare the student for what is currently popular in the maker world, rather than an electronics or engineering degree, and includes some things of interest to amateur radio enthusiasts.
Day 1, Day 2, Day 3, Day 4, Day 5, Day 6, Day 7, Day 8
Day 2: The Arduino, the Arduino IDE, making a light blink
Goals:
-
- Explain what an Arduino is
- Understand how an Arduino program (sketch) is structured
- Upload a program to a microcontroller
- Use a microcontroller to blink an LED
Vocabulary:
-
- IDE
- C++
- Microcontroller
- Arduino
Arduino Tips:
-
- If the board’s lights go out—REMOVE THE POWER IMMEDIATELY
- Check your COM port. If it fails:
- Unplug Arduino
- Look to see which COM ports exist
- Plug it in and note which new one appeared. THAT’S the one you want.
- Test circuit BEFORE trying code
- Build projects in pieces and test each step
- If code fails, look for errors in orange in the bottom box
Light an LED – schematic diagram and wiring
Schematic:
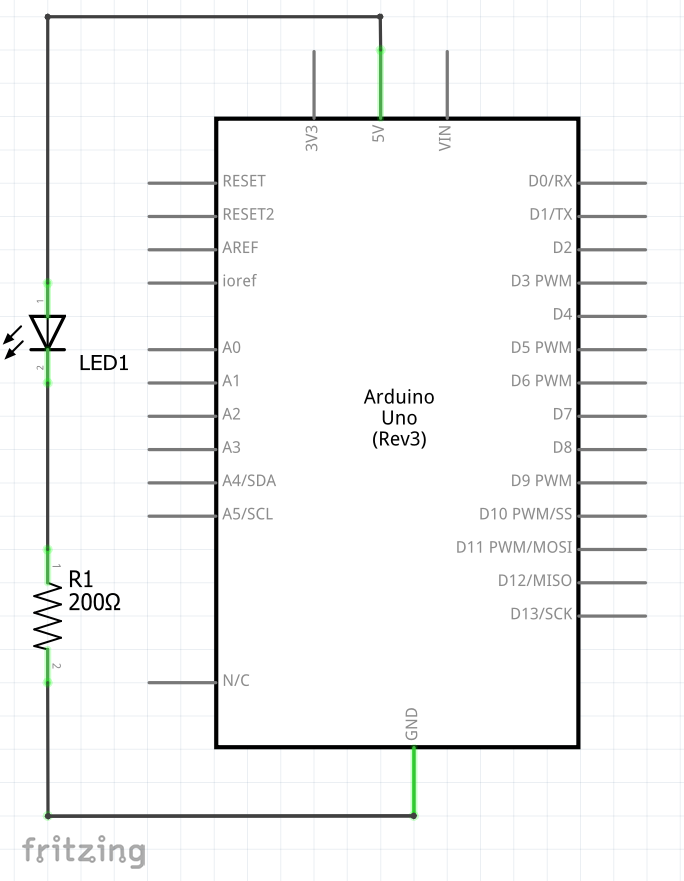
Build:
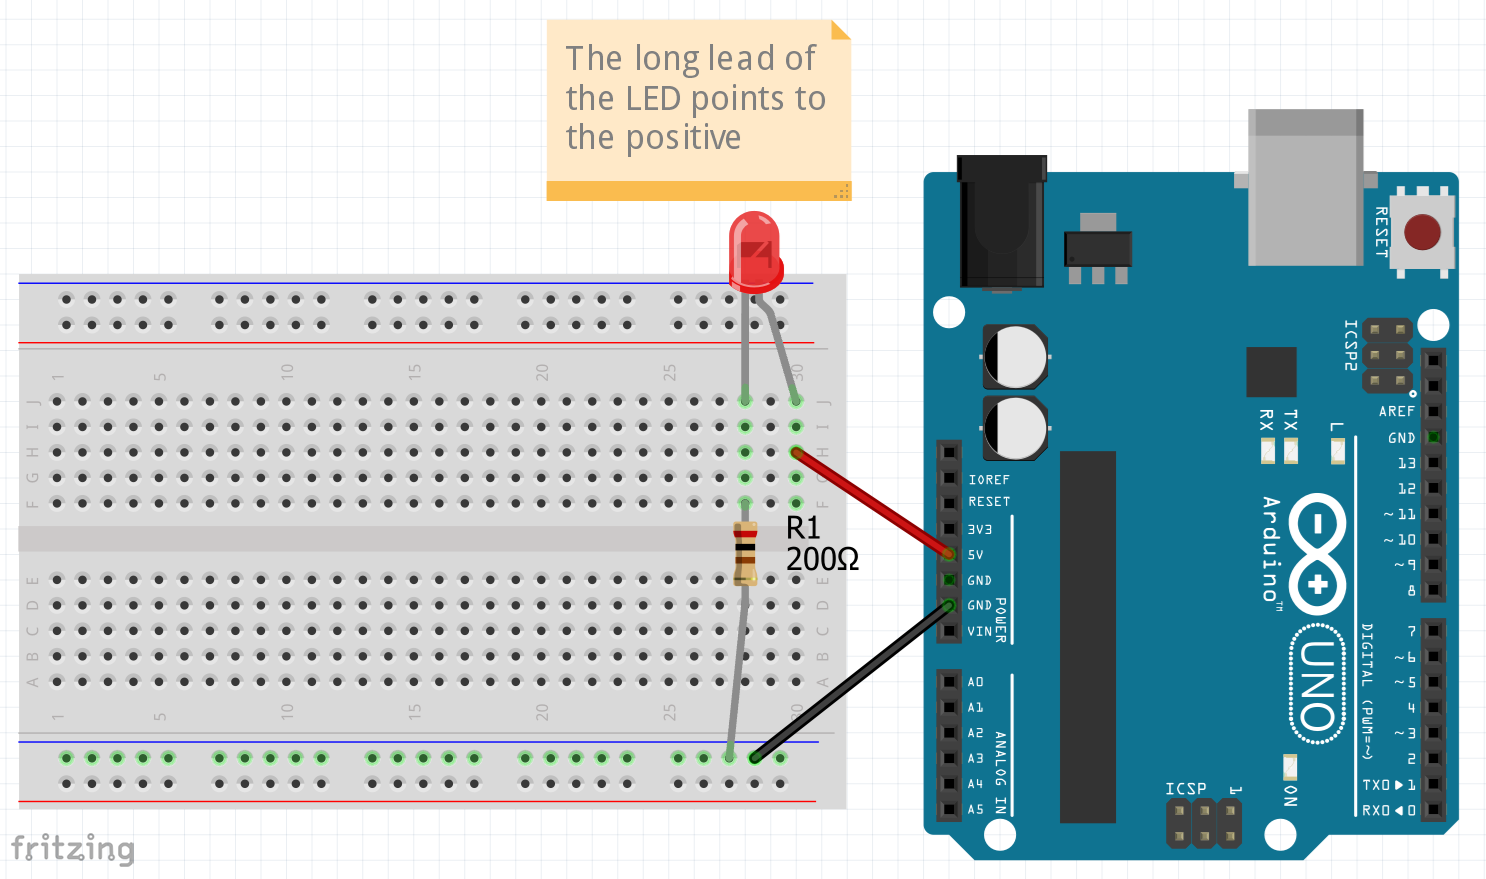
No Code Needed.
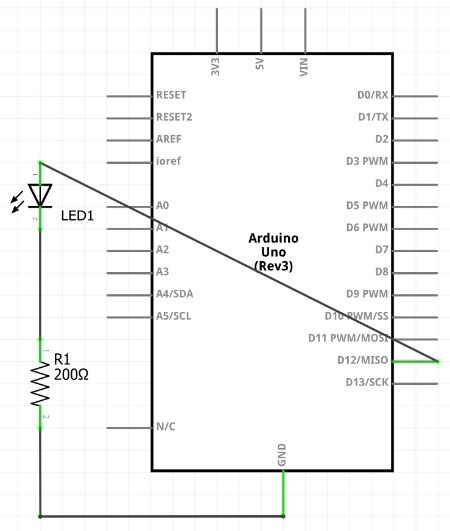
Blink LED – schematic diagram, wiring, and code
Schematic:
Build:
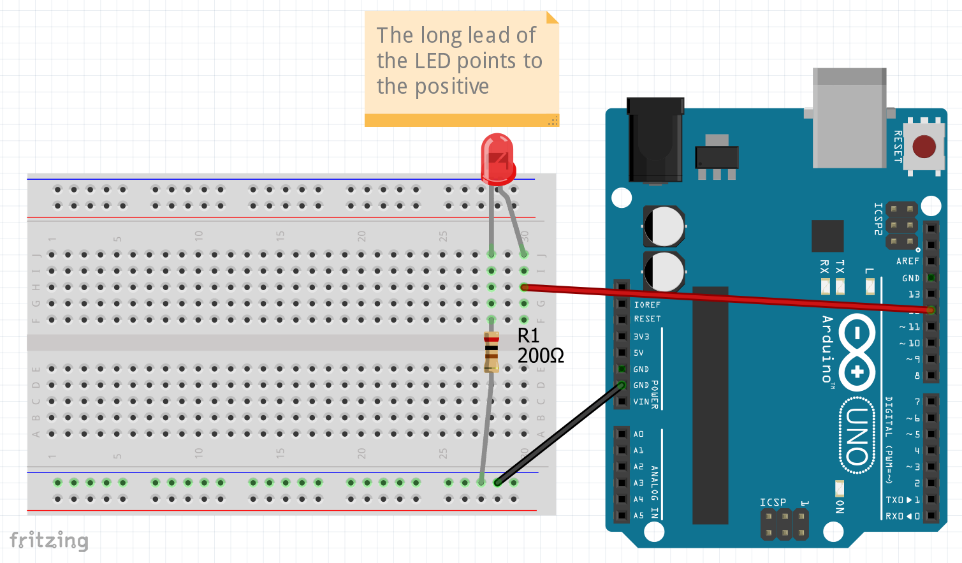
Code:
Blink.ino
Copied!
void setup() {
  pinMode(12, OUTPUT);
  digitalWrite(12, HIGH);  // turn the LED on (HIGH is the voltage level)
  delay(1000);             // wait for a second
  digitalWrite(12, LOW);   // turn the LED off by making the voltage LOW
  delay(1000);             // wait for a second
}

void loop() {
}
Blink x Number of Times
Same wiring as above, but with this code:
Blink-x-times.ino
Copied!
void setup() {
  pinMode(12, OUTPUT);
  for (int i=0; i<5; i=i+1) {
    digitalWrite(12, HIGH);  // turn the LED on (HIGH is the voltage level)
    delay(1000);             // wait for a second
    digitalWrite(12, LOW);   // turn the LED off by making the voltage LOW
    delay(1000);             // wait for a second
  }
}

void loop() {
}
Blink Forever
Same wiring as above, but with this code:
Blink-forever.ino
Copied!
void setup() {
  pinMode(12, OUTPUT);
}

void loop() {
  digitalWrite(12, HIGH);  // turn the LED on (HIGH is the voltage level)
  delay(1000);             // wait for a second
  digitalWrite(12, LOW);   // turn the LED off by making the voltage LOW
  delay(1000);             // wait for a second
}
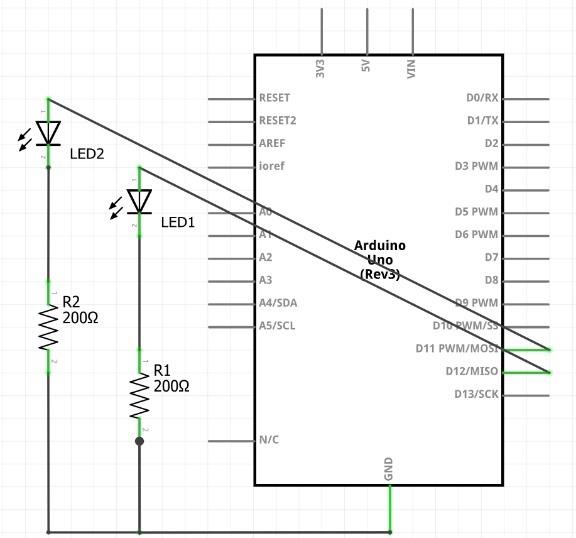
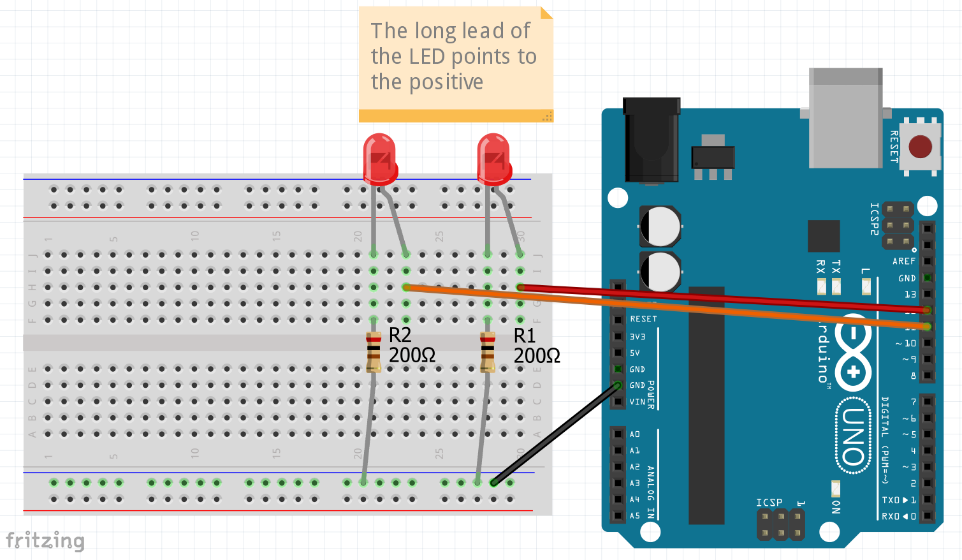
Blink 2 LEDs – schematic, wiring and code
Schematic:
Build
Code:
Blink2.ino
Copied!
void setup() {
  pinMode(12, OUTPUT);
  pinMode(11, OUTPUT);
}

void loop() {
  digitalWrite(12, HIGH);  // turn the LED on (HIGH is the voltage level)
  delay(1000);             // wait for a second
  digitalWrite(12, LOW);   // turn the LED off by making the voltage LOW
  delay(1000);             // wait for a second
  digitalWrite(11, HIGH);  // turn the LED on (HIGH is the voltage level)
  delay(1000);             // wait for a second
  digitalWrite(11, LOW);   // turn the LED off by making the voltage LOW
  delay(1000);             // wait for a second
}
Homework:
-
- Take apart and build LED + resistor 2x and get them to blink
- Get three LEDs to blink independently
- Watch You can learn Arduino in 15 minutes: https://www.youtube.com/watch?v=nL34zDTPkcs
![]()